Thursday 22 December 2022

OCI - WAF - Web Application Firewall

Oracle OCI WAF helps us to protect our web applications or internet facing applications from threats such as OWASP defined vulnerabilities. 

WAF can be used to restrict access based on the Geo location. It can also be used to apply the rate limiting. It also support protection rules , access control and Bot management. 

WAF helps us to protect OCI based applications , On-premise and Multi cloud applications. 

WAF supports two types of Enforcements. 

  • WAF on OCI Load Balancer
  • WAF Edge Enforcement 
    • For On-Prime Applications
    • Multi Cloud , Multi Region Applications. 

WAF Demo:
  • Access OCI Console. 
  • Select Identity and Security from the Menu
  • Select Web Application Firewall
  • Select Create WAF Policy
    • Provide a unique name 
    • Select the compartment
    • Use Legacy Workflow Option to create an Edge Policy
      • New Window will open
      • Provide the following details. 
        • Domain Name :  connect.vijaya.in
        • Additional Domain :  oic.dvp.connect.vijaya.in
        • WAF Origin : Target application to be Protected 
          • Origin Name :  sample-origin-name
          • URI : oic.svn-dvp.connect.vijaya.in
          • Create Policy
        • In case of Edge Policy, once the WAF is activated , OCI console will display the CNAME to be added in DNS Zone. 
          • Go to DNS zone and add the CNAME.
            • Add a CNAME record
              • Domain Name : oic.dvp.connect.vijaya.in
              • RDATA :  WAF-CNAME from the OCI console.
              • TTL : Time to live.

    • In case of WAF for LB continue to the next page. 
    • Add Access Control Rules
      • Add Access Rules
      • Example:
        • Geo restrictions
        • Source IP List
        • HTTP request Methods
        • HTTP Request Headers
        • Cookies
        • Path Check
        • Etc
      • For Each access control rule select the action to be performed. 
        • You can create your own action.
        • Select the pre configured actions
          • Check and Allow
          • Allow
          • Check and Block 
            • Send Error Response Back to the client. 
    • Go to Next Page 
    • Apply rate limiting rules if required
    • Go to next page
    • Apply protect rules. 
      • Select predefined  OWASP rules to block the malicious requests. 
        • Example :
          • Cross Site Scripting
          • SQL Injections
          • Etc 
    • Go to the Next page
    • Select the OCI LoadBalncer to which WAF needs to be applied. 
    • Review
    • Create WAF Policy


Reference for more details: https://www.ateam-oracle.com/post/enhance-security-with-oracle-cloud-infrastructures-web-application-firewall

https://www.ateam-oracle.com/post/using-oci-waf-web-application-firewall-with-oracle-e-business-suite

Wednesday 21 December 2022

DNS Resolution

 Following diagram illustrates how the DNS resolution works in the background. 


Saturday 17 December 2022

SOA - Capture Authentication Details

Add the following property in composite.xml file  

 <service name="InvAdjOnline_ep" ui:wsdlLocation="XxScmInvProcessMaterialTransaction_01.wsdl">

    <interface.wsdl interface="http://www.xxxxx.xx/erp/inv/wsdl#wsdl.interface(XxScmInvProcessMaterialTransaction)"/>

    <binding.ws port="http://www.xxxx.xx/erp/inv/wsdl#wsdl.endpoint(InvAdjOnline_ep/XxScmInvProcessMaterialTransaction_pt)">

    <property name="oracle.webservices.http.headers">Authorization</property>

    </binding.ws>

  </service>


Use the following property in the receive activity to capture the authentication details. 

<bpelx:fromProperties>

          <bpelx:fromProperty name="Authorization" variable="authTokenVar"/>

        </bpelx:fromProperties>

Tuesday 18 October 2022

Fusion - BICC Configuration

Oracle ERP provides an another offering called BICC - Business Intelligence  Cloud Connector to extract the data from Fusion table and publish the data to UCM or OCI Object Storage.  

It also provides an option to publish the data to OAC - Oracle Analytics Cloud. BICC contains list of Public View Objects (PVO) which are custom SQL views written to extract the data from Fusion database. 

Oracle will keep updating this PVO list and the View Objects as part of each patch updates. We can get the PVO list and corresponding table and column details from an excel sheet published by Oracle.  Oracle Link 

In this blog I will let you know what all configurations we need to perform to extract and process the data using BICC. 

Before we start , we need to have BIACM_ADMIN and BICC_UCM_CONTENT_ADMIN role assigned to our user-id. 

  • We can access the BICC console using following URL  - https://hostinstance.fa.ocs.oraclecloud.com/biacm/


  • On the right side , select the settings menu and select "Manage Offerings and Data Stores" to find the predefined offerings (Grouped Entities - SCM, Order Management , HCM etc.). 
  • Each offering will contain the PVO's related to a particular entity - SCM, HCM etc.
Create Custom Offering
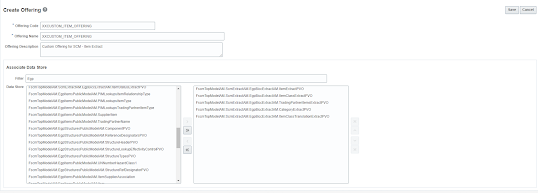
  • We can create a custom offering to select specific PVO and group it. 
    • Select Actions and then select create offering option
    • Select the required PVO and create a custom offering. 


  • We can select and deselect the columns from PVO to restrict the data access. 
  • We can select the PVO and select "Select Columns" option to select or deselect the column. 
  • These customizations which we are applying for each PVO can be extracted and imported into other instances. 

Configure External Storage: 
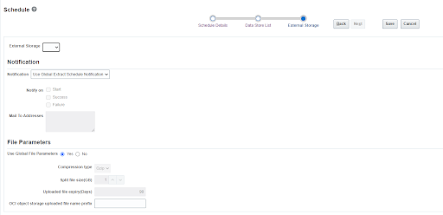
  • Select Configure External Storage option to configure UCM , OCI Object Storage and OAC configurations. 
  • We can specify which storage to use while executing the PVO using BICC webservice. 

Schedule BICC Extract: 
  • We can execute PVO to extract the data using SOAP Service or by scheduling it manually. 
  • We can use the scheduling option to Schedule the PVO or Submit the Extract manually. 
  • Use "Manage Extract Schedules" to submit it manually or check the status of the previous runs. 
  • Select Add action
    • Provide a name
    • Select the schedule time
    • Select Next
    • Select the offering
    • Select the PVO
    • Select the External Storage
    • Save the schedule


Extract Files: 

  • Every time when we execute the PVO , it will generate 3 files. 
    • JSON File  :  This will hold the execution and output file details. 
    • Manifest File : This will have the data file details. 
    • Data File  : Actual Data File

Jobs and Jobs Schedule:
  • We can execute multiple PVO's together by using Jobs
  • We can create Job by giving name and description
    • Select the offerings
    • Select the PVO's to be executed in parallel
    • Save the Job
  • Schedule Jobs by using Job Schedule option. 


Monday 17 October 2022

Fusion - BICC - SOAP Service Details

 Use the following SOAP service to execute the BICC PVO and publish the data to Object Storage. 

https://servername.fa.us2.oraclecloud.com/bi/ess/esswebservice?wsdl


SubmitRequest Operation

<submitRequest xmlns:nstrgmpr="http://xmlns.oracle.com/types/submitbiacm/1654097574293/OutboundSOAPRequestDocument" xmlns:nsmpr0="http://www.w3.org/2005/08/addressing" xmlns:tns="http://xmlns.oracle.com/scheduler" xmlns:ns33="http://xmlns.oracle.com/scheduler/types" >   <nstrgmpr:Headers>

   <nstrgmpr:SOAPHeaders>
            <nsmpr0:MessageID>112233</nsmpr0:MessageID>
            <nsmpr0:Action>submitrequest</nsmpr0:Action>
        </nstrgmpr:SOAPHeaders>
    </nstrgmpr:Headers>
    <nstrgmpr:Body>
        <tns:submitRequest> 
<!-- Can be Any Value-->
            <tns:description>VIJAYA_BICC_EXTRACT</tns:description>
            <tns:jobDefinitionId>
<!-- Required : Constant Value-->
                <ns33:name>BICloudConnectorJobDefinition</ns33:name>
<!-- Constant Value-->
                <ns33:packageName>oracle.apps.ess.biccc</ns33:packageName>
<!-- Required : Constant Value-->
                <ns33:type>JOB_DEFINITION</ns33:type>
            </tns:jobDefinitionId>
<!-- Required : Constant Value-->
            <tns:application>oracle.biacm</tns:application>
            <tns:requestedStartTime/>
            <tns:requestParameters>
                <ns33:parameter>
                    <ns33:dataType>STRING</ns33:dataType>
<!-- Required : Constant Value-->
                    <ns33:name>SYS_className</ns33:name>
<!-- Required : Constant Value-->
                    <ns33:value>oracle.esshost.impl.CloudAdaptorJobImpl</ns33:value>
                </ns33:parameter>
                <ns33:parameter>
                    <ns33:dataType>STRING</ns33:dataType>
<!-- Required : Constant Value-->
                    <ns33:name>SYS_application</ns33:name>
<!-- Required : Constant Value-->
                    <ns33:value>BI Cloud Adaptor</ns33:value>
                </ns33:parameter>
                <ns33:parameter>
                    <ns33:dataType>STRING</ns33:dataType>
<!-- Required : Constant Value-->
                    <ns33:name>EXTRACT_JOB_TYPE</ns33:name>
<!-- Required : Constant Value-->
                    <ns33:value>VO_EXTRACT</ns33:value>
                </ns33:parameter>
                <ns33:parameter>
                    <ns33:dataType>STRING</ns33:dataType>
<!-- Required : Constant Value-->
                    <ns33:name>DATA_STORE_LIST</ns33:name>
<!-- Required : PVO Name -->
                    <ns33:value>FscmTopModelAM.PrcPozPublicViewAM.SupplierPVO</ns33:value>
                </ns33:parameter>
                <ns33:parameter>
                    <ns33:dataType>STRING</ns33:dataType>
<!-- Required : Constant Value-->
                    <ns33:name>EXTERNAL_STORAGE_LIST</ns33:name>
<!-- Required : Variable Value :  Configured Object Storage Name -->
                    <ns33:value>VIJAYA_BICC</ns33:value>
                </ns33:parameter>
            </tns:requestParameters>
        </tns:submitRequest>
    </nstrgmpr:Body>
</submitRequest>


Get Completion Status Async:

<soapenv:Envelope xmlns:soapenv="http://schemas.xmlsoap.org/soap/envelope/" xmlns:sch="http://xmlns.oracle.com/scheduler">
    <nstrgmpr:Headers>
   <nstrgmpr:SOAPHeaders>
            <nsmpr0:MessageID>112233</nsmpr0:MessageID>
            <nsmpr0:Action>getCompletionStatus</nsmpr0:Action>
            <nsmpr0:ReplyTo>
                            <nsmpr0:Address>Callback_URL</nsmpr0:Address>
            </nsmpr0:ReplyTo>
        </nstrgmpr:SOAPHeaders>
    </nstrgmpr:Headers>
   <soapenv:Body>
      <sch:getCompletionStatus>
         <sch:requestId>12345</sch:requestId>
      </sch:getCompletionStatus>
   </soapenv:Body>
</soapenv:Envelope>


Reference :  https://docs.oracle.com/en/cloud/saas/applications-common/22d/biacc/soap-api.html#u00180699


Friday 14 October 2022

Angular - Validate Required Element Value

Use the following code to check the value of the required element.  


<div *ngIf="fname.touched && fname.invalid" class="alert">
            <p *ngIf="fname.errors?.['required']">FirstName is mandatory</p>
            <p *ngIf="fname.invalid">Invalid First Name</p>
        </div>


Monday 12 September 2022

iCal Expressions


FREQ=DAILY;BYHOUR=4,5,6,7,8,9,10,11,12,13,14,15,16,17,18;BYMINUTE=0,10,20,30,40,50;BYSECOND=0;

FREQ=MONTHLY;BYMONTHDAY=1,10,15;BYHOUR=5,10,15,20;BYMINUTE=15;

FREQ=YEARLY;INTERVAL=3;BYMONTH=3;BYDAY=2,22;

<Every Three years on May 2nd and 22nd >


BYYEARDAY

BYWEEKNO

BYMONTH

BYSETPOS

WKST


FREQ= “SECONDLY” / “MINUTELY” / “HOURLY” / “DAILY”/ “WEEKLY” / “MONTHLY” / “YEARLY”

hour = 1DIGIT / 2DIGIT ;0 to 23

weekday = “SU” / “MO” / “TU” / “WE” / “TH” / “FR” / “SA”


Mule - API Designer - RAML - API First Development

Mulesoft support API First development method by using API Designer and Exchange server. This feature help the organizations are define and publish standard and reusable API's.  

As part of  API first development strategy, we can define API's , get it reviewed by different LOB, stake holders and publish the final API for discovery and consumption.   

This will help the organization to streamline the development process by reusing existing API's and speedup the delivery process. 

Mulesoft provides API Designer to design and develop API definitions. API Designer will use RAML specifications to define an API. 

API designer will provide mock service capabilities to test the API definition.  We can use the Public endpoints to test the API definitions from Postman or Advanced Rest Client.

We can publish the API definition to Mulesoft Exchange server and this will create an API portal . API portal provides a console for documentation, mock service and sharing capabilities. 

We can  share the API definition with users within our organizations and with public users (Client applications) .

User can discover API definition , verify using mock service and consume the API for processing requests. 

Follow below steps to access, design and develop API's using Mulesoft. 

  • Access following any-point URL by providing login credentials   - https://anypoint.mulesoft.com/
  • Click the burger menu (Left side) to access the Mulesoft offerings. 
    • Design Center -  API designer
    • Exchange Server
    • Management Centre. 
  • Use Design Center to design API's
    • Select Create New to create 
      • API Specification 
      • New Mule App - Flow design
      • New Fragment
      • New Async API
    • We will API Specification to create New API
      • Provide a Project Name - Example Common Integration Pattern
      • Select Comfortable designing on my own option with RAML 1.0 option
      • This will create - Common-Integration-Pattern.raml file
      • RAML uses YAML standards to define API
      • You will see four windows
        • Left - File Browser 
        • Right - API Console
        • Center - Editor Window
        • Bottom - Shelf 
      • RAML is indent based definition. Make sure we will follow the right indentation. 
      • Based on the indentation , Shelf will display the corresponding tags we can add. 
      • Center window will display the RAML version which we have selected and the project name which we have provided. 
      • Under this we can add Root elements . 
        • baseUri - To specify the base URL
        • Protocol - HTTP/HTTPS
        • Version 
        • etc
      • I will provide the baseUri: https://svn-ics-enterprise.com
      • Under this provide the context URL
        • /submitIntegration :
      • Under the context URL , provide the HTTP methods
        • get
        • post
      • We can provide URL parameter under base context URL. Make a note of indentation.
/submitIntegration :
  get:
  post:
  
  /{IntegrationRunId}:
      • We can provide the http methods allowed for each context URL paths 
      • Under each HTTP method we can mention the content type and query parameters. 
      • We can create a Folder and add data model (Data Type)
      • Left side under file browser select +
      • Select Folder
      • Provide a name - DataModel
      • Under DataModel select +
        • Add Data Type file to define the Request and Response Structure. 
          • Select File Type as Data Type from the list. 
          • Add the data type object 
          • Refer below sample 
        • Add Example file to define sample request and response Message. 
          • Select file type as Example
          • Add Sample Values
          • Refer below sample
      • Publish the API definition to Exchange Server. 
        • Use the publish option on the right corner
        • Provide the version number


Sample RAML File: 


#%RAML 1.0
title: Common Integration Pattern
#baseUri: https://svn-ics-enterprise.com

types:
  RequestMessage : !include /DataModel/IntegrationRequestType.raml

/submitIntegration :      
  post:
    body:
      application/json:
        type: RequestMessage
        examples:
          input: !include /DataModel/IntegrationRequestExample.raml
    responses:
      200:
        body:
          application/json:
            type: object
            example:
              Message: "Successfully Submitted"

  get:
    queryParameters:
      IntegrationCode:
        required: true
    responses:
      200:
        body:
          application/json:
            type: RequestMessage
            examples:
              output: !include /DataModel/IntegrationRequestExample.raml

  /{IntegrationRunId}:
    get:
      responses:
        200:
          body:
            application/json:
              type: RequestMessage
              examples:
                output: !include /DataModel/IntegrationRequestExample.raml


Sample Data Type:

#%RAML 1.0 DataType

type: object
properties:
  "IntegrationCode": string
  "RunBy": string
  "Status": string
  "RunId": integer
  "TransactionId": string
  "Output": string
  "ErrorCode": string
  "ErrorMessage": string
  "Parameters": 
    type: array
    items: ---> Mandatory for adding array of elements. Array Type should have items under it.
      properties:
        "ParameterName": string
        "ParameterValue": string
        "ParameterScope": string
        "ParameterType" : string
        "ParameterSequence": integer


Sample Example Value File:

#%RAML 1.0 NamedExample

value:
  IntegrationCode: ProcessInvoice
  RunBy: VijayaKumar
  Status: Start
  RunId: 1234
  TransactionId: abc1234
  Output: Success
  ErrorCode: XXXX
  ErrorMessage: Sampl Error
  Parameters:
  -
      ParameterName: InvoiceType
      ParameterValue: CreditMemo
      ParameterScope: Step
      ParameterType: BIP
      ParameterSequence: 1
  -
      ParameterName: Supplier
      ParameterValue: SaanviNihal
      ParameterScope: Step
      ParameterType: BIP
      ParameterSequence: 2
  

Database Admin Commands

Use the following commands to test the connection and configurations. 

  • Check the listener status
    • lsnrctl status <Alias_FROM_listener_Or_TNSnames_ORA>
  • iSQL command to access Postgres database.
    • isql <alias_name> -v

Saturday 20 August 2022

Sample JAX-RS REST API Implementation

 We can use different  tools and technologies to create and expose a REST API. In this blog I will explain how to create a simple JAX-RS REST API using JDeveloper. 

  • Open Jdeveloper and create a new ADF REST Web Application
  • Provide an application name - JaxRsSampleApp
  • Provide a package name - xxvk.svn
  • Select Next and Keep the default Project Name 
  • Select Finish
  • This will generate two projects. 
    • RESTModel
    • RESTWebservice
  • Delete the RESTModel project
  • Right click the RESTWebservice project and select new
  • Select Java Class and provide a name. - HelloService
  • Add following  @Path("/services") before the class definition // Note : Path can be anything
  • Select the warning/error next to Path and select add JaxRs package to the project. 
  • As soon as you add the JAX RS package to the project it will generate the main application Java class - GenericApplication with an extend jax.rs.core.Application
  • Delete the default method and add the following sample method to return sample plain text. 
  • Right click the project and select project properties
    • Got to Java EE Application
    • Context Root to a meaning full value. -- HelloService
  • Save changes 
  • Right click the Java service and select RUN. 
  • This will deploy the application to Integrated server and provide the sample URL
    • http://127.0.0.1:7101/xxvk-service/resources/services
  • Take the URL and paste in a browser. It will display the result. 
    package xxvk.svn;
    import javax.ws.rs.GET;
    import javax.ws.rs.Path;
    import javax.ws.rs.Produces;
    import javax.ws.rs.core.MediaType;

@Path("/services")
public class HelloService {
        @GET  // This will import the Get package
        @Produces(MediaType.TEXT_PLAIN)  // This will produce the out put in plain text format
        public String Sayhello(){
            return "Hello Welcome";
        }
}


Friday 19 August 2022

SOA - Receive Message From EJB

 We can use EJB service to receive message from locally deployed EJB applications. We can use the following steps to create a SOA application to consume message from an EJB.

  • Create a SOA application 
  • Create an empty SOA project
  • Select the SOA project created above , right click and select New option 
  • Select Java class and provide class name and package name and select ok
  • If you get a prompt to select the folder then select project_name/src folder
  • Overwrite the generated class with below sample interface code. 
        package svn.com.callback;
        import java.util.List;
        import svn.com.model.XxComStatus;  // POJO class representing incoming message structure.
        public interface class_name
            {
              public String exec(XxComStatus status);
            }

        • Go to SOA composite add select EJB service
        • Provide Service Name - ConsumeEJBMessage
        • Provide a meaningful JNDI Name - ConumeCallbackMessageEJB
        • Provide Java Interface Name as - svn.com.callback.class_name  // Taken from above Java code. 
        • Open the composite SOURCE tab and add the missing values. 
          <service name="ConsumeEJBMessage">
            <interface.java interface="svn.com.callback.class_name"/>
            <binding.ejb uri="ConumeCallbackMessageEJB" ejb-version="EJB3" javaInterface="svn.com.callback.class_name"/>
          </service>
        • Create a BPEL process without service definition
        • Now wire EJB service and BPEL. This will generate the service WSDL
        • Now you can update the SOA composite as per the business requirement. 


        Sample Composite:


        Reference : https://technology.amis.nl/it/publish-soa-composite-application-as-ejb-to-be-invoked-from-java-applications-using-ejb-binding/

        Monday 4 July 2022

        Oracle Fusion - Enable Federated SSO with Oracle Identity Cloud Service (IDCS) as Identity Provider

        In this blog , I will explain what all configurations we need to perform to establish a federated SSO between  IDCS which will act as IdP and Oracle Fusion - SaaS which will act as Service Provider - SP

        Pre - Configurations : 

        • IDCS : 
          • Get the Oracle IDCS - IDP Metadata XML using this link: https://<IDCS-Service-Instance>.identity.oraclecloud.com/fed/v1/metadata
          • Save the file - IDP_Metadata.xml
          • Note:  In case if you get an error like Page Not Working then follow the below instructions to enable certificate access. 
            • Login to IDCS admin console. 
            • Go to Settings
            • Select Default Settings option
            • Enable - "Access Signing Certificate"
            • Save the changes. 
            • Now access the metadata URL. 
         
        • Fusion-SaaS:
          • Get Service Provider Meta Data.
            • Use the following URL and download the SP_MetaData.xml
            • https://login-ics-dev1-saasfaprod1.fa.ocs.oraclecloud.com/fed/sp/metadata
              • domain_name : ics-dev1
          • Get Tenant and Domain Names:
            • Example Fusion URL - https://fa-ics-dev1-saasfaprod1.fa.ocs.oraclecloud.com/fscmUI/
            • Tenant or POD Name : ics-dev1
            • Domain Name : saasfaprod1.fa.ocs.oraclecloud.com

        Main Configurations: 

        Fusion-SaaS:
        • Login to SaaS application using Security Admin User. 
        • Go to Security Console
        • Select Single Sign-On on left Menu
        • Click + Create Identity Provider.
          • Select Edit On Top
          • Provide following details. 
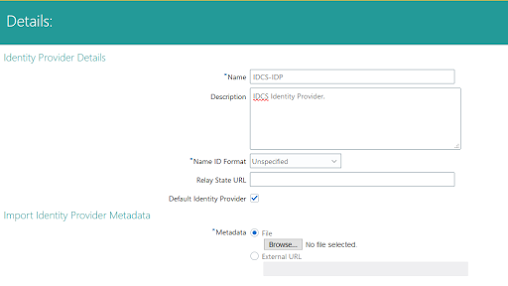
            • Name : IDCS-IDP
            • Description : IDCS Identity Provider.
            • Name Id Format - Unspecified - Select from drop down. 
            • Select Default Identifier Option.  
            • Upload the Meta data file downloaded from IDCS - Refer Above Pre-config steps. 
            • Save and Close


              • Select Service Provider Tab
              • Download the Service Provider Signing Certificate. 


            IDCS Configurations: 

            • Create Fusion Application :
              • Login to IDCS
              • Go to Applications
              • Select Add ( + )
              • Select App Catalog
              • Search for Oracle Fusion 
              • Select R13 app
            • Provide following details to the App - 
              • Name : Fusion ERP SSO App
              • Description : Fusion ERP SSO App
              • Select required SaaS Applications
              • Go to Next Page
              • Open the SP_Metadata.xml file downloaded as part of pre-config  step. 
              • Get EntityId value
                • entityID="https://login-ics-dev1-saasfaprod1.fa.ocs.oraclecloud.com:443/oam/fed"
              • Assertion Consumer Value:
                • <md:AssertionConsumerService Binding="urn:oasis:names:tc:SAML:2.0:bindings:HTTP-POST" Location="https://login-ics-dev1-saasfaprod1.fa.ocs.oraclecloud.com/oam/server/fed/sp/sso" index="1"/>
              • Upload the signing certificate that was downloaded from Fusion apps during SSO configuration. Refer Above Fusion activity . 
              • Download Signing Certificate and Identity Provider Metadata and save as file and click “Next”
              • On the Provisioning tab DO NOT Enable Provisioning and click the Finish button to complete the application setup
              • Activate the application. 

            TEST and ENABLE SSO :
            • Login to SaaS application using Security Admin User. 
            • Make sure the user is present in IDCS and updated as Federated. Same User is present in SaaS as well --- Note
            • Go to Security Console
            • Select Single Sign-On on left Menu
            • Select the IDCS-IDP created earlier. 
              • Select Diagnostics and Activation 
              • Select TEST
              • Select IDCS-IDP and Click Start SSO
              • It will take you to IDCS login Page. 
                • Provide SSO credentials. 
                • After Successful authentication Status will get updated as Success. 
                • Enable Identity Provider. 


            OCI - OGW - Oracle Gateway Configurations

            Oracle offers multiple API management tools.  API Platform Cloud Service and Oracle Native Gateway or OCI Gateway are the prominent ones. 

            API Platform Cloud Service will be managed by customers. Customer is responsible for managing API security and Infrastructure.  Customer needs to provision API PCS and then provision gateway server (Weblogic Server) to deploy all the application API. 

            API PCS provides a management console to create and manage APIs . API's will be published to gateway servers.  Gateway servers will connect and poll the changes and deploy them on to the server. 

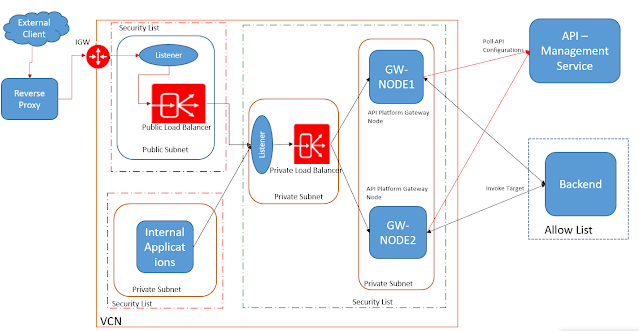
            Following network flow diagram will show how the traffic flow can be configured and how the gateway servers will interact with management servers and backend applications. 


            API PCS

            Network Flow Diagram


            Oracle offers Gateway - a fully managed service to manage APIs. Here the customer is responsible for creating and managing API definition and security.  Underlying infrastructure is managed by Oracle.  

            As part of OCI gateway configurations, we need to create a gateway and then deployments (API definitions).  Gateway will be created on a specific Compartment , VCN and Subnet. 

            Specific security groups can be added or can be used to control access to the gateway.  We can use custom certificates while creating a gateway to enable mTLS connection. 

            Create a deployment/API

            •     Provide a name. -- xxapi
            •     Provide a path prefix   -- ogw
            •     Select create from Scratch Option
            •     Select Authentication Policy to restrict access using JWT or Custom Authentication.
              • JWT
                • Authentication Token - Header
                • Header Name - Authorization
                • Authentication Schema -- Bearer
                • Issuer - https://identity.oraclecloud.com/ 
                • Audience - Add the scopes to be allowed. 
                • Public Keys
                  • In this example , we will use the static key
                  • Static Key
                    • Provide a Key Id
                    • Format - JSON Web Key
                    • Get the Json Webkey from IDCS. Use the following endpoint to get the key - https://idcs-.identity.oraclecloud.com/admin/v1/SigningCert/jwk
            Note :  Before accessing the key make sure access certificate is enabled in IDCS . Settings -> Default Settings and Toggle ON the Access Signing Certificate

            Sample WebKey : 
            {"format":"JSON_WEB_KEY","kid":"SIGNING_KEY","kty":"RSA","key_ops":["verify"],"alg":"RS256","n":"giU9t2dMPM_c_XXXXXXXXXXXXXXXXXXXXUrfr4iyqz7ULr67uAWiJl5ETjE-FMQIMqRtrtbcnXXXXXXXXXXXXXXXXXXXXXXXXXXXXXXXXXXXXXXXXXXXXXXXXXXXXXXXXXXXXXXXXXXKAPTpQj85ZM_8uzLdqvwr713IbNa0HEJ-Cia4jadNxVSiFNDWP-tUiX-M6yEq9CHL26vngNpDCvJ1-vf9hfwO0TQ","e":"AQAB"}

                  • Remote JWKS  : To retrieve the keys at run time. 
            • Create Routes
              • Provide the incoming path
                • Sample : 
                  • /target/services/default/{contextRoot}/{client_ep*}
              • Select the methods to be allowed from Source. 
              • Select the backend Type
                • HTTP
                • Oracle Function
              • Incase of HTTP backend provide the backend URL
                • https:/target_hostname/target/services/default/${request.path[contextRoot]}/${request.path[client_ep]}
              • Can define multiple routes pointing to multiple target applications. 

            • Save changes. 

            OCI Command

            oci api-gateway deployment create --compartment-id ocid1.compartment.oc1..id_value --display-name dvpc2s --gateway-id ocid1.apigateway.oc1.eu-frankfurt-1.oci_id --path-prefix /dvpc2s --specification file:////home/VijayaKuma/tlndvpc2s.json


            Friday 1 July 2022

            Weblogic Maven Deployment

            Use the following sample POM template for ADF deployment. 

            Maven Command for deployment: 

            Deploy Using SSL/T3S  port and custom Keystore. 

            mvn -Dbuild.properties.file=${property} -Djavax.net.ssl.keyStoreType=JKS -Dweblogic.security.SSL.ignoreHostnameVerification=true -Dweblogic.security.TrustKeyStore=CustomTrust -Djavax.net.ssl.trustStore=${trustStoreFile}  -Dweblogic.security.CustomTrustKeyStoreType=JKS -Dweblogic.security.CustomTrustKeyStoreFileName=${trustStoreFile} -Dweblogic.security.CustomTrustKeyStorePassPhrase=welcome1  -Djavax.net.ssl.trustStorePassword=welcome1 pre-integration-test


            Deploy Using HTTP/T3 port 

            mvn -Dbuild.properties.file=${property} pre-integration-test

            WAR Deployment

            <project xmlns="http://maven.apache.org/POM/4.0.0">

               <modelVersion>4.0.0</modelVersion>
               <groupId>vk.services</groupId>
               <artifactId>VKUAssertion</artifactId>
               <version>1.0</version>
               <description>Super POM for VKUAssertion</description>
               <packaging>pom</packaging>
               <build>
                  <resources>
                     <resource>
                        <directory>src/</directory>
                        <includes>
                           <include>**</include>
                        </includes>
                     </resource>
                  </resources>
                  <plugins>
                     <plugin>
                        <groupId>org.codehaus.mojo</groupId>
                        <artifactId>properties-maven-plugin</artifactId>
                        <version>1.0-alpha-2</version>
                        <executions>
                           <execution>
                              <phase>initialize</phase>
                              <goals>
                                 <goal>read-project-properties</goal>
                              </goals>
                              <configuration>
                                 <files>
                                    <file>${build.properties.file}</file>
                                 </files>
                              </configuration>
                           </execution>
                        </executions>
                     </plugin>
                     <plugin>
                        <groupId>com.oracle.adf.plugin</groupId>
                        <artifactId>ojmake</artifactId>
                        <configuration>
                           <ojmake>${oracleHome}/jdeveloper/jdev/bin/ojmake</ojmake>
                           <files>${basedir}/VKUAssertion.jws</files>
                        </configuration>
                        <executions>
                           <execution>
                              <phase>compile</phase>
                              <goals>
                                 <goal>compile</goal>
                              </goals>
                           </execution>
                        </executions>
                     </plugin>
                     <plugin>
                        <groupId>com.oracle.adf.plugin</groupId>
                        <artifactId>ojdeploy</artifactId>
                        <configuration>
                           <ojdeploy>${oracleHome}/jdeveloper/jdev/bin/ojdeploy</ojdeploy>
                           <workspace>${basedir}/VKUAssertion.jws</workspace>
                 <!-- Project Name --->
                           <project>WebService</project>
                <!-- Project Deployment Profile --> 
                           <profile>VKUAssertion</profile>
                           <outputfile>${project.build.directory}/${project.build.finalName}.war</outputfile>
                        </configuration>
                        <executions>
                           <execution>
                              <phase>package</phase>
                              <goals>
                                 <goal>deploy</goal>
                              </goals>
                           </execution>
                        </executions>
                     </plugin>
                     <plugin>
                        <groupId>com.oracle.weblogic</groupId>
                        <artifactId>weblogic-maven-plugin</artifactId>
                        <version>12.2.1-3-0</version>
                        <executions>
                           <execution>
                              <id>wls-deploy</id>
                              <phase>pre-integration-test</phase>
                              <goals>
                                 <goal>redeploy</goal>
                              </goals>
                              <configuration>
                                 <adminurl>${SERVER_URL}</adminurl>
                                 <user>${USER_NAME}</user>
                                 <password>${PASSWORD}</password>
                                 <!--<source>${project.build.directory}/${project.build.finalName}.ear</source>-->
                                 <source>${project.build.directory}/${project.build.finalName}.war</source>
                                 <targets>${TARGET_SERVER}</targets>
                                 <verbose>true</verbose>
                                 <remote>true</remote>
                                 <upload>true</upload>
                                 <name>${project.build.finalName}</name>
                              </configuration>
                           </execution>
                        </executions>
                     </plugin>
                  </plugins>
               </build>
               <parent>
                  <groupId>com.oracle.adf</groupId>
                  <artifactId>adf-parent</artifactId>
                  <version>12.2.1-4-0</version>
                  <relativePath/>
               </parent>
               <repositories>
                  <repository>
                     <name>OracleMaven</name>
                     <id>maven.oracle.com</id>
                     <url>https://maven.oracle.com</url>
                  </repository>
               </repositories>
               <pluginRepositories>
                  <pluginRepository>
                     <name>OracleMaven</name>
                     <id>maven.oracle.com</id>
                     <url>https://maven.oracle.com</url>
                  </pluginRepository>
               </pluginRepositories>
            </project>


            EAR Deployment: 


            <?xml version="1.0" encoding="UTF-8" ?>
            <project xmlns="http://maven.apache.org/POM/4.0.0">
              <modelVersion>4.0.0</modelVersion>
              <groupId>vk.services</groupId>
              <artifactId>VKUApplication1</artifactId>
              <version>1.0</version>
              <description>Super POM for VKUApplication1</description>
              <packaging>pom</packaging>
              <build>
                <resources>
                  <resource>
                    <directory>src/</directory>
                    <includes>
                      <include>**</include>
                    </includes>
                  </resource>
                </resources>
                <plugins>
            <plugin>
                    <groupId>org.codehaus.mojo</groupId>
                    <artifactId>properties-maven-plugin</artifactId>
                    <version>1.0-alpha-2</version>
                    <executions>
                      <execution>
                        <phase>initialize</phase>
                        <goals>
                          <goal>read-project-properties</goal>
                        </goals>
                        <configuration>
                          <files>
                            <file>${build.properties.file}</file>
                          </files>
                        </configuration>
                      </execution>
                    </executions>
                  </plugin>
                  <plugin>
                    <groupId>com.oracle.adf.plugin</groupId>
                    <artifactId>ojmake</artifactId>      
                    <configuration>
                      <ojmake>
                      ${oracleHome}/jdeveloper/jdev/bin/ojmake
                      </ojmake>
                      <files>
                        ${basedir}/VKUApplication1.jws
                      </files>
                    </configuration>
                    <executions>
                      <execution>
                        <phase>compile</phase>
                        <goals>
                          <goal>compile</goal>
                        </goals>
                      </execution>
                    </executions>
                  </plugin>
                  <plugin>
                    <groupId>com.oracle.adf.plugin</groupId>
                    <artifactId>ojdeploy</artifactId>
                    <configuration>
                      <ojdeploy>
                        ${oracleHome}/jdeveloper/jdev/bin/ojdeploy
                      </ojdeploy>
                      <workspace>
                        ${basedir}/VKUApplication1.jws
                      </workspace>
            <!-- Application Deployment Profile --> 
                      <profile>
                        VKUApplication1
                      </profile>
                      <outputfile>
                        ${project.build.directory}/${project.build.finalName}.ear
                      </outputfile>
                    </configuration>
                    <executions>
                      <execution>
                        <phase>package</phase>
                        <goals>
                          <goal>deploy</goal>
                        </goals>
                      </execution>
                    </executions>
                  </plugin>
                 <plugin>
            <groupId>com.oracle.weblogic</groupId>
            <artifactId>weblogic-maven-plugin</artifactId>
            <version>12.2.1-3-0</version>
            <executions>
              <execution>
               <id>wls-deploy</id>
               <phase>pre-integration-test</phase>
               <goals>
            <goal>redeploy</goal>
               </goals>
               <configuration>
            <adminurl>${SERVER_URL}</adminurl>
            <user>${USER_NAME}</user>
            <password>${PASSWORD}</password>
            <source>${project.build.directory}/${project.build.finalName}.ear</source>
            <targets>${TARGET_SERVER}</targets>
            <verbose>true</verbose>
            <remote>true</remote>
            <upload>true</upload>
            <name>${project.build.finalName}</name>
               </configuration>
              </execution>
            </executions>
            </plugin>
                </plugins>
              </build>
              <parent>
                <groupId>com.oracle.adf</groupId>
                <artifactId>adf-parent</artifactId>
                <version>12.2.1-4-0</version>
                <relativePath></relativePath>
              </parent>
             <repositories>
                <repository>
                  <name>OracleMaven</name>
                  <id>maven.oracle.com</id>
                  <url>https://maven.oracle.com</url>
                </repository>
              </repositories>
              <pluginRepositories>
                <pluginRepository>
                  <name>OracleMaven</name>
                  <id>maven.oracle.com</id>
                  <url>https://maven.oracle.com</url>
                </pluginRepository>
              </pluginRepositories>
            </project>

            IDCS - Identity Federation with Azure and Google (SAML IDP & Social IDP)

              Collect IDCS Meta Data Enable "Access Signing Certificate" option to get the IDCS metadata.   Default Domain Settings ->  Sel...